


By Megan McConnell Hughes | BHG.Com
Troy Warren for CNT

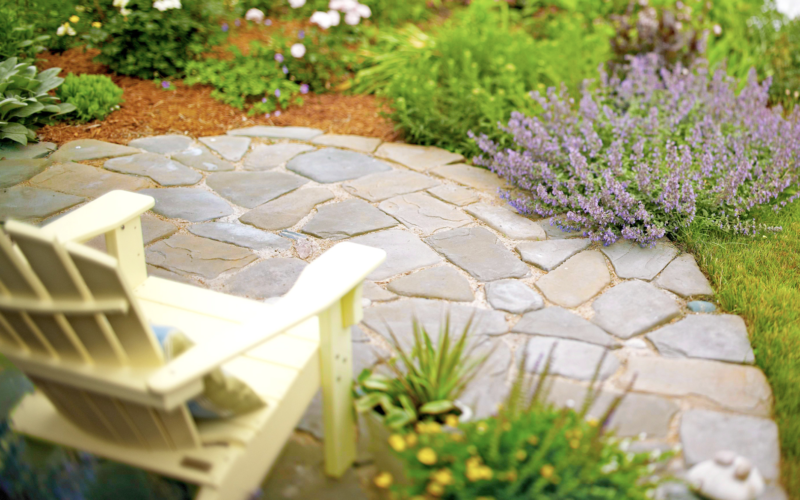
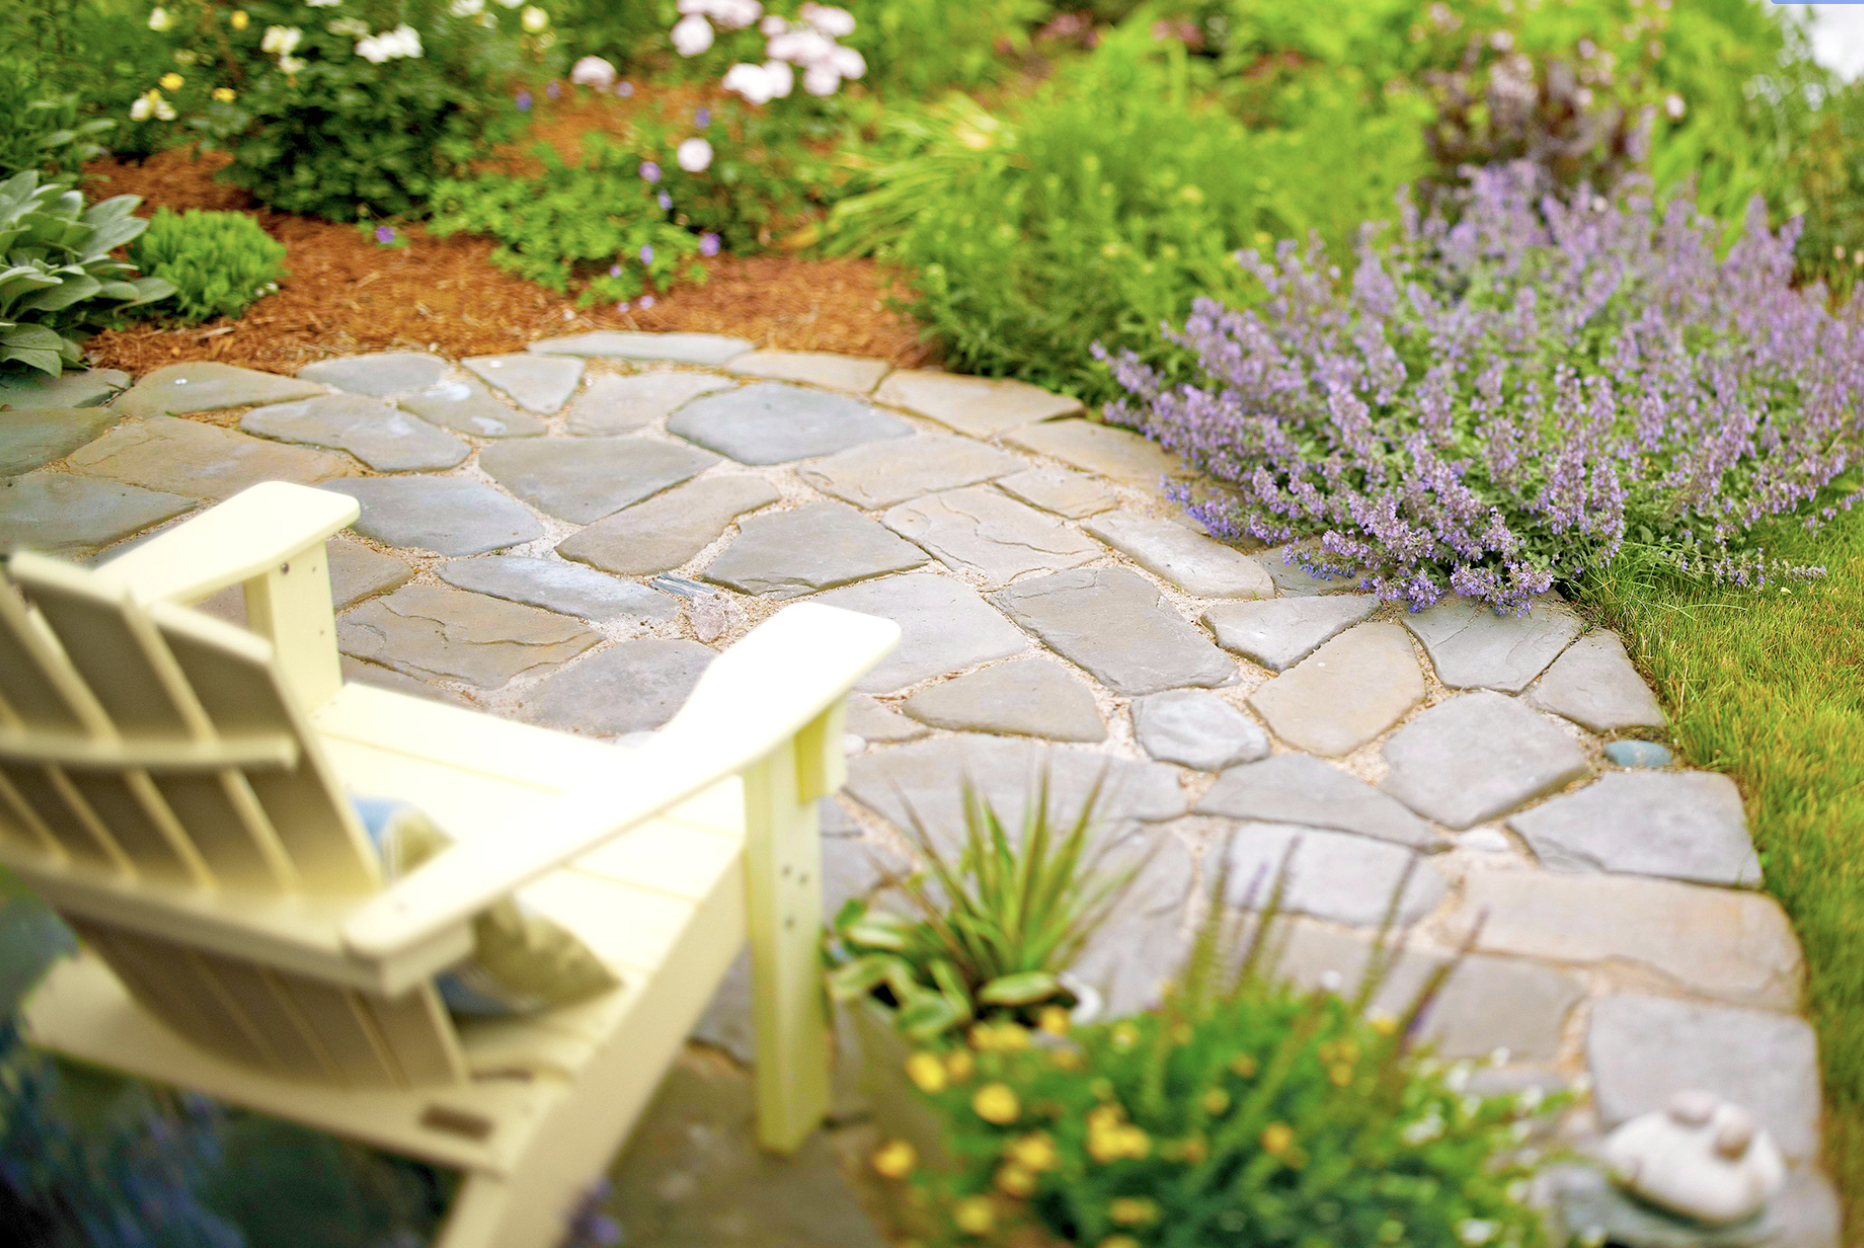
In just one weekend, you can update your outdoor living space for entertaining. Learn how to build a patio with flagstones, bricks, or pavers.
Incorporate a stone patio into your backyard or garden for an easy outdoor room. The hard surface gives patio furniture firm footing, so you can create a seating ensemble for outdoor dining, morning coffee, or simply relaxing with friends. To build your own DIY patio, you’ll need gravel or limestone paver base, sand, and your choice of patio material. Bricks, pavers, or flagstones all create sturdy and attractive stone patio designs.
When planning your DIY patio project, save yourself some work and choose a pattern that doesn’t require cutting the patio material. Bricks or pavers in straight or gently curving patterns typically work well for an easy DIY patio. Flagstones, with their irregular shapes, are ideal for an informal patio with natural appeal.
How to Build a Patio
Building a patio is much like putting together a puzzle. Rotate the pieces until they fit together, working to create a nearly uniform space between the stones. Use the following tutorial for how to build a flagstone, brick, or paver patio. The basic steps for this DIY patio are the same for each material.
What You’ll Need
- Garden hose or stakes and mason line
- Spade
- Tamper or plate compactor
- Wheelbarrow
- Landscape fabric
- Gravel or limestone paver base
- Builder’s sand (also called leveling sand)
- PVC pipe (2) cut to the length of your patio
- 2×4 board
- Flagstones, bricks, or pavers
- Plastic edging (optional)
- Polymeric jointing sand
- Broom
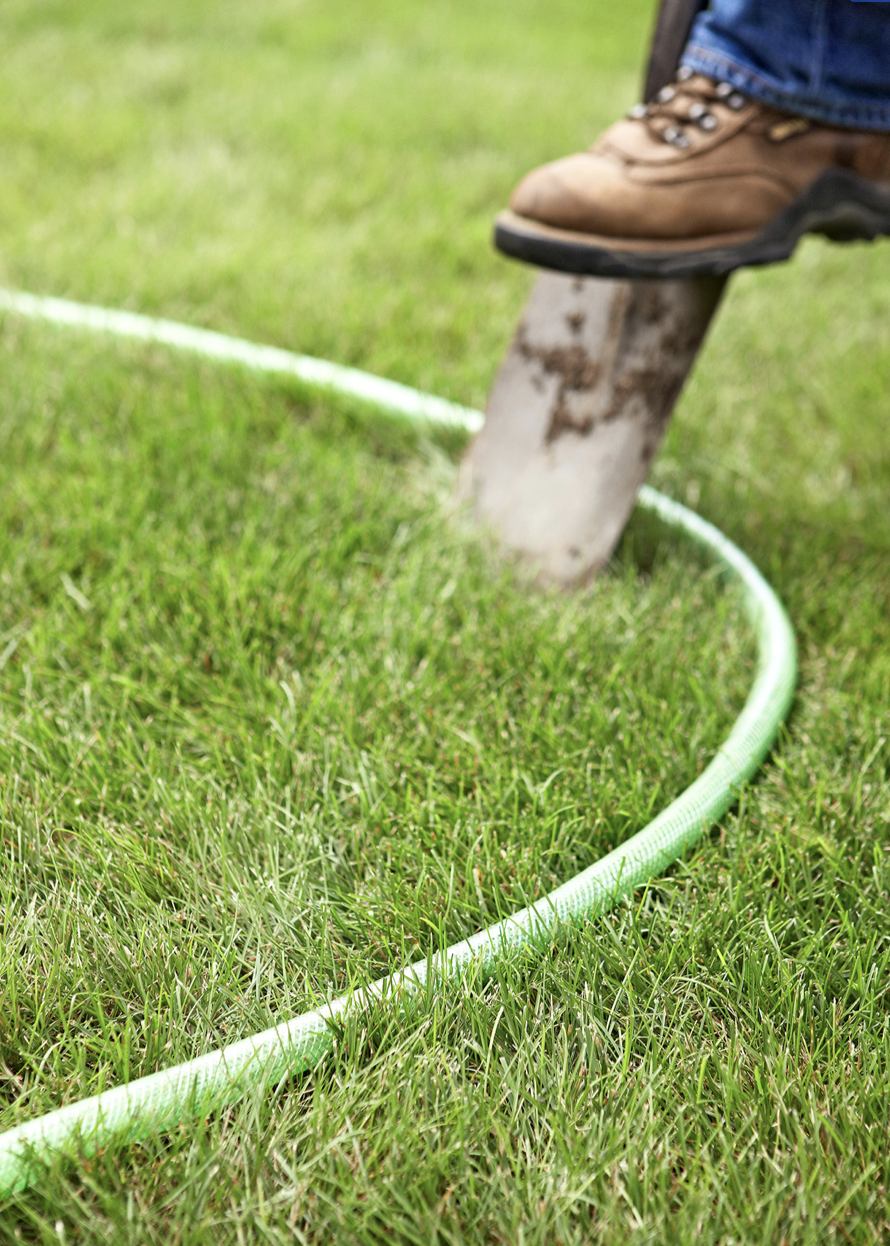
1. Outline Your DIY Patio and Remove Sod
Lay a garden hose on the ground or use stakes and mason line to define the shape of your DIY patio. If you’re undecided about the best size for your new space, build a slightly larger patio than you were intending. Making an existing stone patio larger later on is often more challenging than simply building a large patio in the beginning.
Using a sharp garden spade shovel ($32, The Home Depot), remove the sod and soil at the patio location. Excavate an 8-inch-deep base plus the thickness of the flagstone, brick, or paver. If building a patio near your home, slope the site away from your home’s exterior. Use a level to create a 1-inch drop every 4 feet. Once all sod has been removed, use a tamper to compact the dirt.
Use a wheelbarrow to transport the excess soil to a compost pile, a low spot in the yard, or along the foundation.
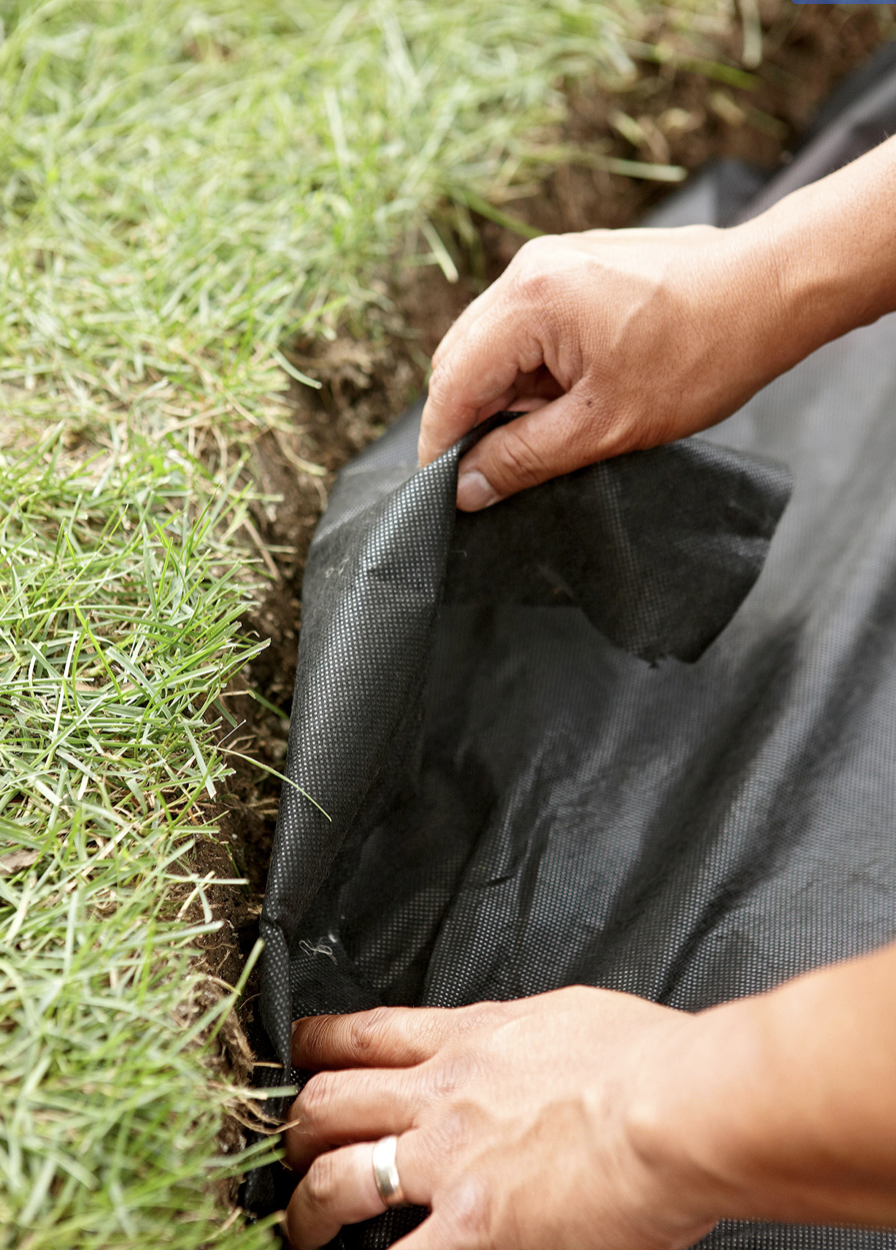
2. Add Landscape Fabric to Patio Base
Line the excavated area with landscape fabric ($13, The Home Depot), cutting the fabric to fit. Although this is not an essential step in the process of building a patio, it helps prevent weeds from sprouting between the patio stones. Landscape fabric is fairly inexpensive and easy to install, so this weed control method is well worth it.
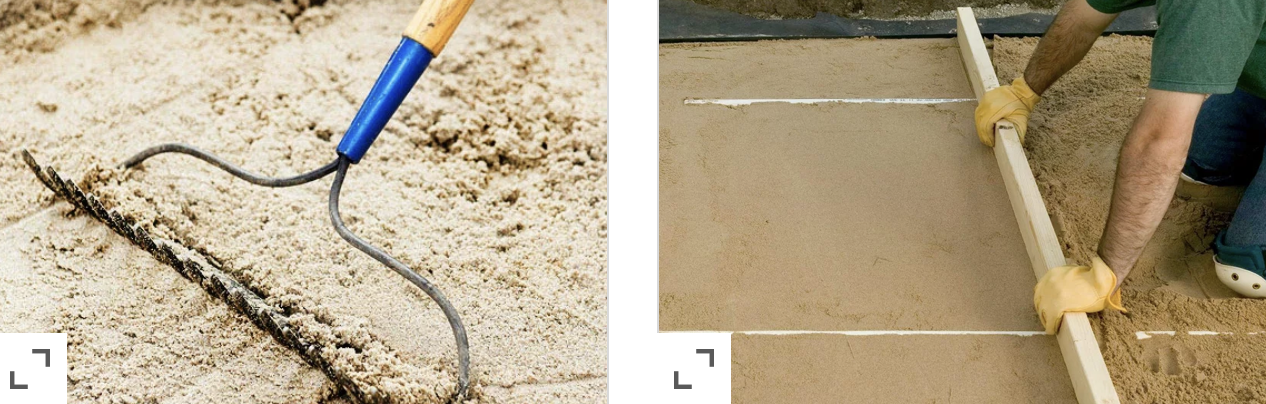
3. Build a Patio Base of Gravel and Sand
Add gravel or limestone paver base to the excavated area and spread it to form a 6-inch-deep layer over the entire patio space. If using limestone paver base, use a garden hose to lightly wet the material. Use a tamper or a rented plate compactor to create a firm base. If using gravel, spread a 1-inch-deep layer of builder’s sand on top. Again, use a tamper or plate compactor to create a smooth surface for your DIY patio.
If you decide to use limestone paver base, you’ll need to finish with leveling sand. Start by laying two 1-inch PVC pipes across the length of the area. These should be cut to size so they fit within the patio base. Spread 1 inch of leveling sand on top. Next, lay your 2×4 across the PVC pipes and slide the sand across to make level. Remove the pipes and fill in gaps with sand.
Editor’s Tip: If your DIY patio is located near your home, once again use a level to ensure the base slopes away from your home before moving onto the next step.
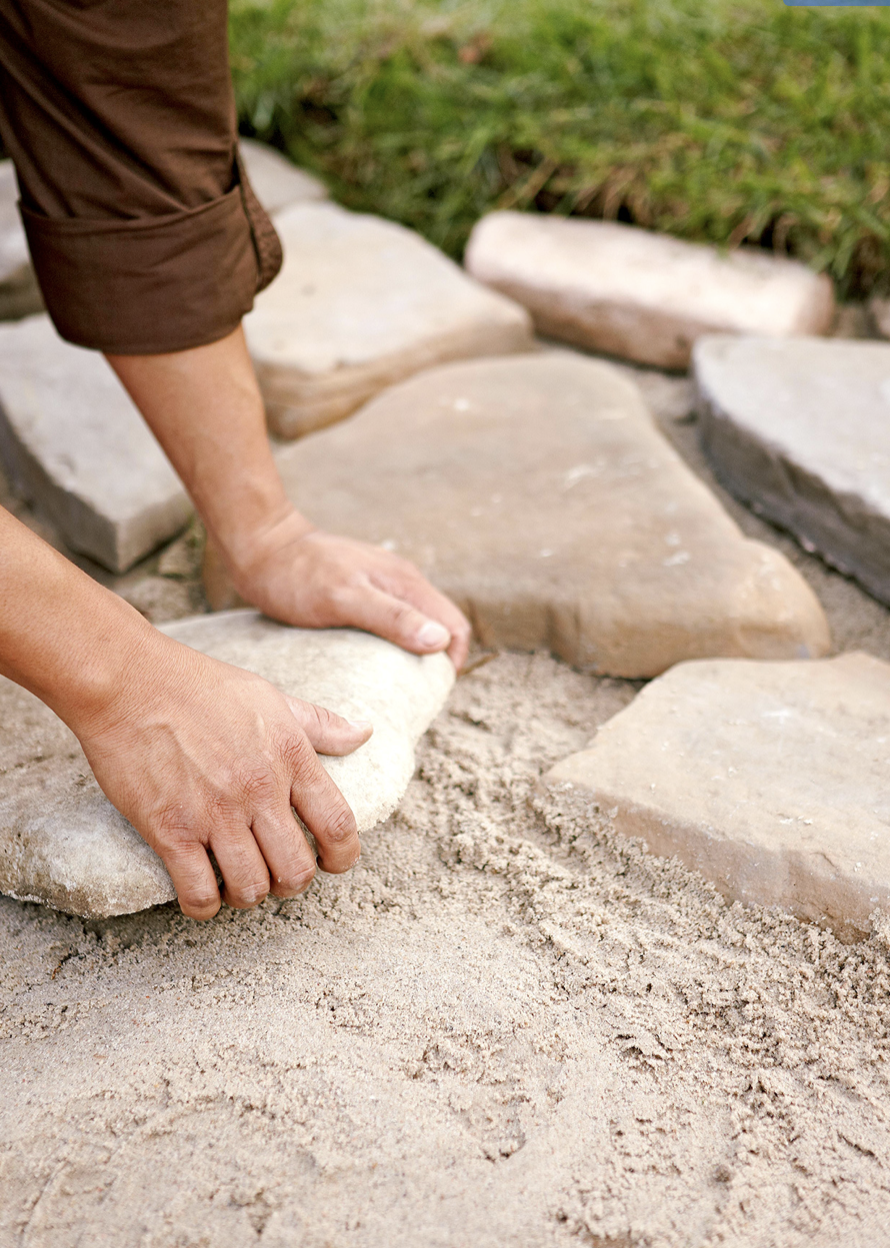
4. Place Stones in Patio
Beginning on one side of the patio, lay the first flagstones or pavers. Add sand underneath the stone as necessary to create a nearly level surface. Place the stones as close together as possible. Large gaps between stones invite weed seeds to germinate and add to the uneven nature of the patio surface. If desired and your patio shape allows, install plastic edging ($8 for 6 feet, Lowe’s) around the perimeter of your patio.
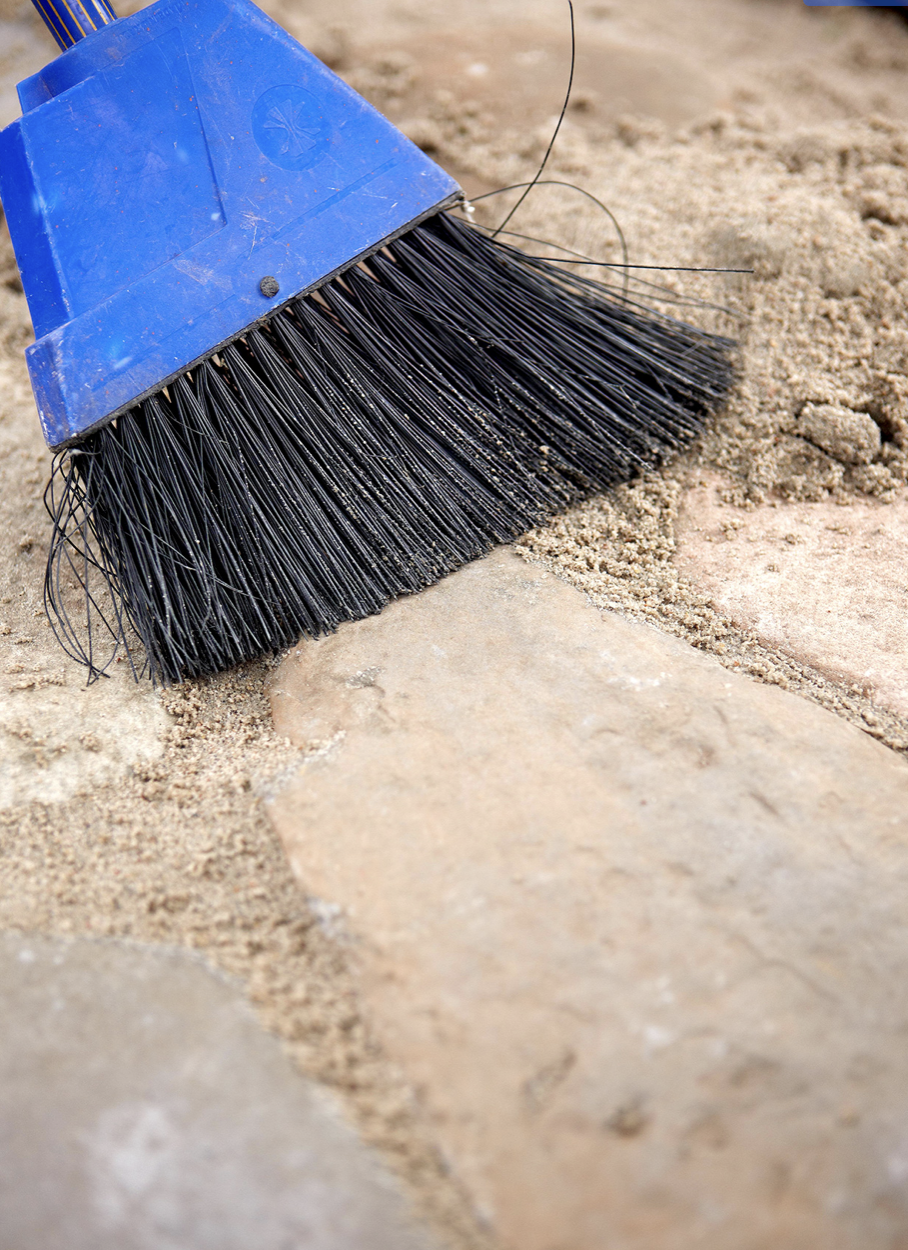
5. Top Patio with Sand
After all the bricks, pavers, or flagstones are in place, spread polymeric jointing sand over the patio. Use a stiff broom to sweep sand over the bricks until the cracks are filled. Remove excess sand using a leaf blower at a low speed. Water the surface with a fine mist from a garden hose to encourage the sand to sink into the spaces between the stones. Repeat the process of adding sand, sweeping, and watering about a week after construction to ensure a durable finish for your DIY patio.
6. Maintain Your DIY Stone Patio
Round up your outdoor seating and a table or two to decorate your new paver patio. If the patio stones start to wobble over time (or the sand begins to wear away), add additional sand between the cracks, sweep, and water with a hose to maintain a smooth patio surface. To prevent mildew and stains on your stone patio, plan to clean the stones at the beginning and end of the outdoor season with a pressure washer or by scrubbing with a detergent solution.


In Other NEWS