By BH&G Editors
Troy Warren for CNT #HomeGarden
How to plant a container may seem a little daunting at first, but picture-perfect pots can be yours when you keep a few simple things in mind. As a bonus, we’ve also included a few plant combination ideas for sun and shade container gardens to get you started.
Container gardens are an easy, versatile way to add color in your garden or on your porch. But there’s more to it than throwing some begonias and impatiens in a pot and calling it a day. Aesthetically, you’ll get much better results by varying the height, color, and texture of plants. Then, there’s the needs of the plants themselves to consider. Some plants grow well in both sun and shade, while others are pickier about their preferred light exposure. And when it comes to watering, some plants require a daily drenching while others can go a few days without a drink. These six tips will walk you through how to create a beautiful container garden that you’ll enjoy all season long.
1. Choose a Container Based on Your Climate, Budget, Space, and Style
Much like plants, containers have their own characteristics to take into account, such as weight, sensitivity to weather changes, and appearance. You’ll also want to consider your budget, space, and style when choosing a container. Keep in mind that the larger the size of your container, the less you will need to water, but whichever you choose, always make sure it has holes in the bottom to allow extra water to drain out. Some common types of pots include the following.
- Terra-Cotta: Versatile and inexpensive, terra-cotta containers are also referred to as clay pots. You can find them plain or with colorful glazes on the outside. The only downside to using terra-cotta is that they are somewhat fragile. They will chip and crack if handled too roughly, and can be damaged by freezing temperatures (empty and store them indoors for the winter in colder regions).
- Concrete: Concrete containers can take any type of weather. Be careful when placing your concrete planters because they are extremely heavy and even more difficult to move once they’re filled with soil and plants.
- Wood: Pick a durable wood, like cedar or nontoxic treated pine. To help them last longer, brush all surfaces with a clear waterproofing sealer labeled for use on outdoor wood.
- Metal: Galvanized tubs and buckets are great options for container gardens. However, beware when using a metal container because they will heat up quickly in the sun and cook your plants. To protect the plants, line the container with garden fabric and place it in a shady spot.
- Plastic, Fiberglass, or Resin: These types of containers can be made to look like just about any other type of container (but at a lower price and lighter weight). They aren’t as high quality and won’t last forever, but they can accomplish a certain look.
- Repurposed Containers: Choose old baskets, tin buckets, birdbaths, and watering containers to house your favorite plants. The thrifted look is stylish and rustic.
2. Limit the Number of Plants You Use
Be careful not to overfill a container garden. If the plants are overcrowded, growth can be stunted above and below the soil. To lessen the chances of overfilling a container, you will generally want to follow these pot size-to-plant ratios:
- 10″ to 12″ pot can house 3-4 plants
- 14″ to 16″ pot can house 5-7 plants
- 16″ to 20″ pot can house 6-9 plants
3. Think about Color Schemes and Plant Combinations
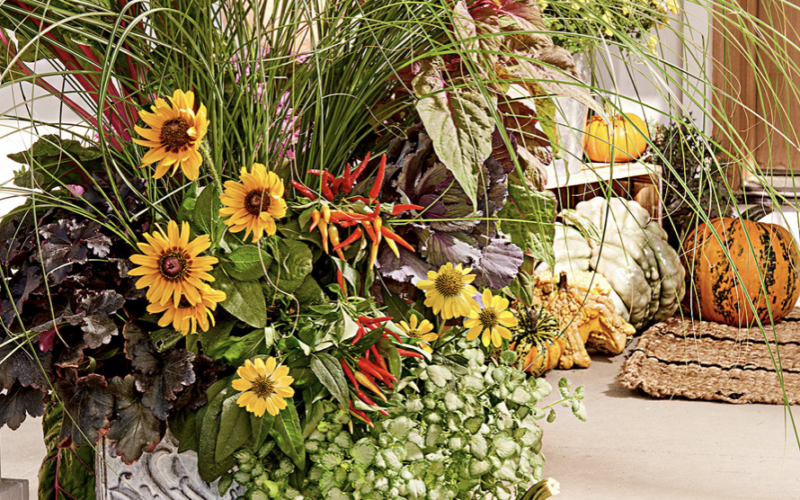
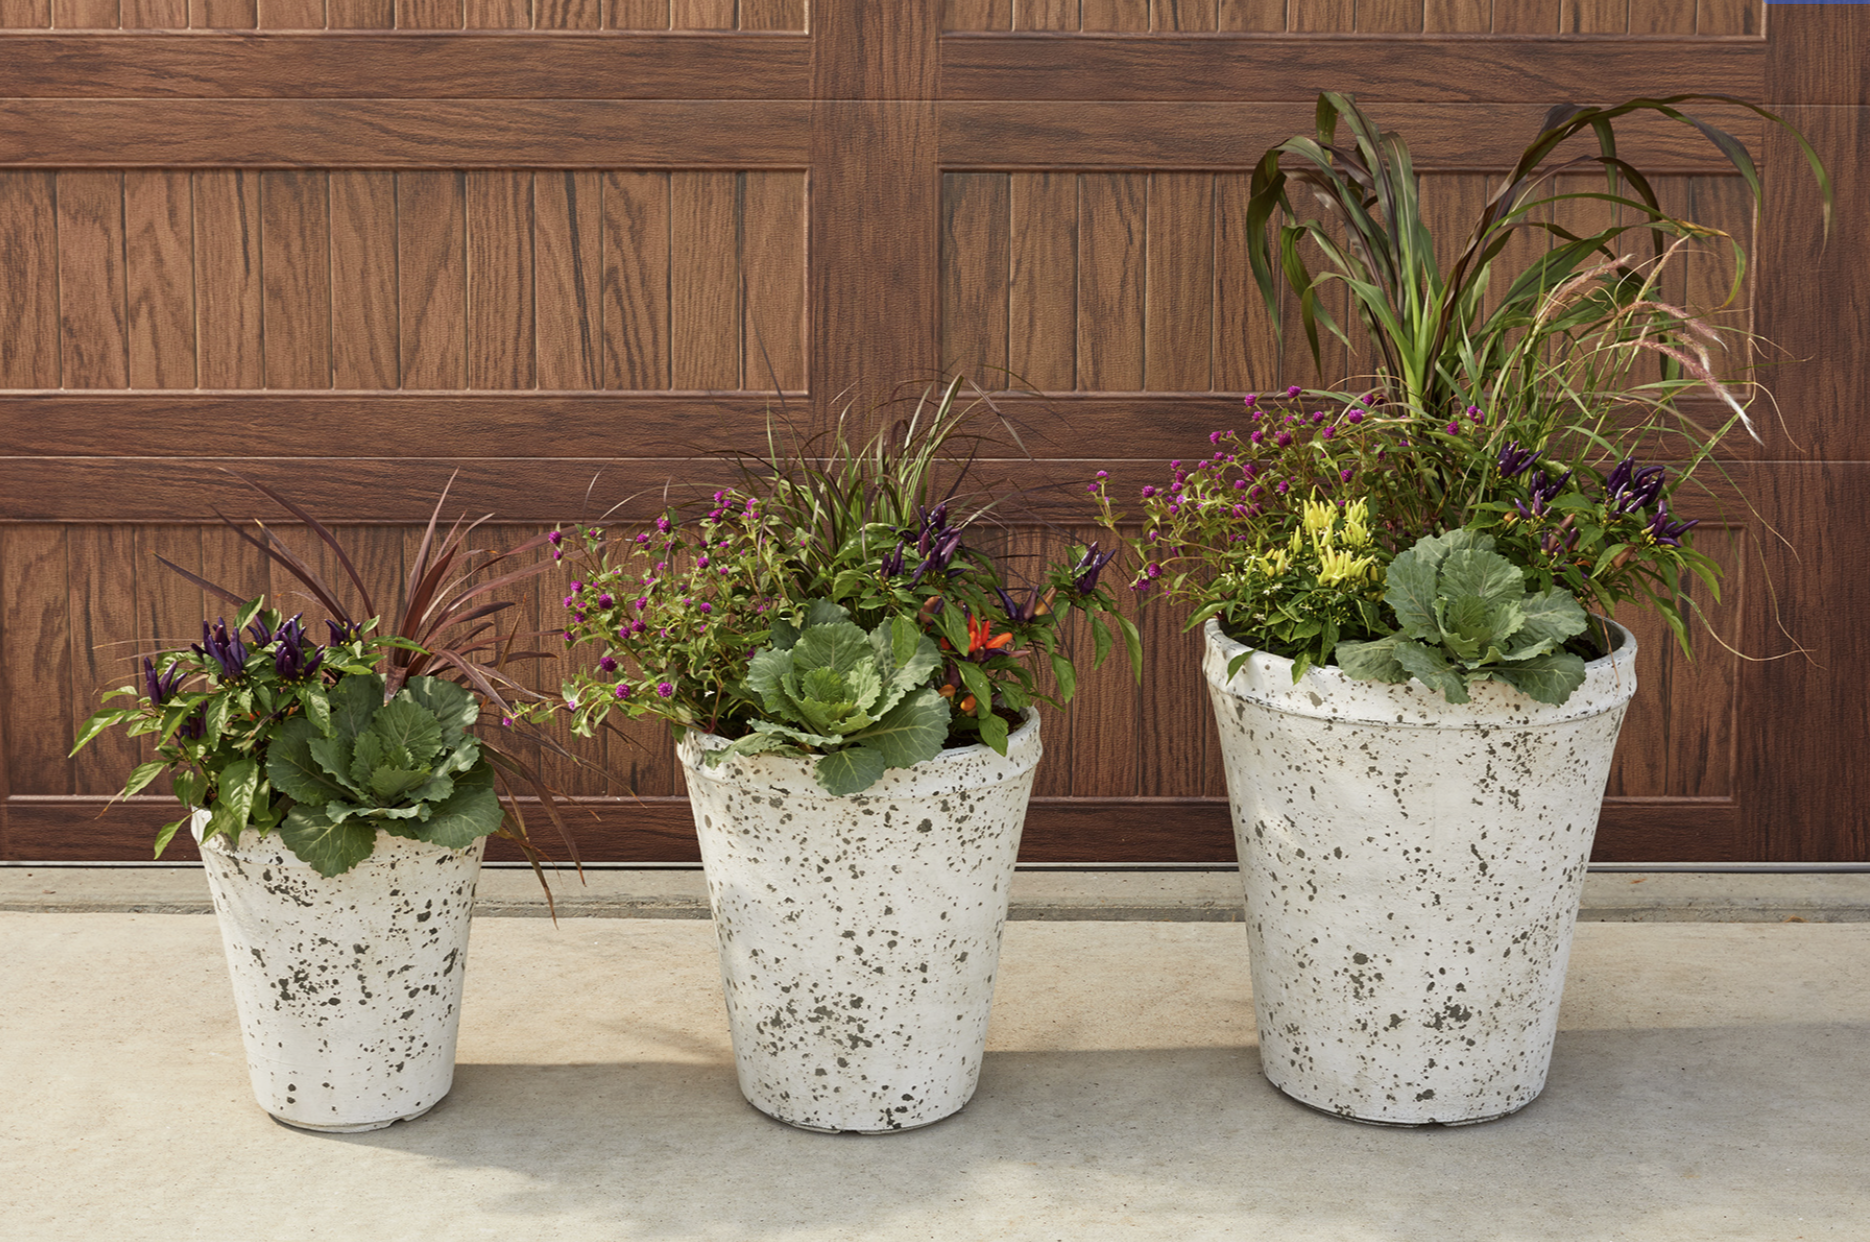
Having a color theme for your container garden can help you select a good mix of plants. You can play off the color of your container, or focus on the flowers and foliage of the plants you plan to include. Try to plant in odd numbers, which will give your container a more designed, asymmetrical look. And be sure to keep this rule of thumb in mind when selecting plants for your container: have a thriller, a filler, and a spiller. Combining these three types of plants adds interest and balance to any container garden.
- Thriller: These plants add height, drama, and a vertical element. Some options include foliage plants, ornamental grasses, or upright flowering plants. Thrillers typically go near the center of a container.
- Filler: Fillers tend to be more rounded or mounded plants and serve the purpose of making the container look full. These are generally placed in front of or around the thriller. In a long and narrow container like a window box, fillers are placed midway between the edge of the container and the thriller variety.
- Spiller: Trailing plants that hang over the edge of the planter are considered spillers. If the container is going to be seen from all sides, be sure that spillers are placed on all sides.
4. Add Small Rocks and Use Potting Soil for Proper Drainage
Once you’ve selected your plants and a container, it’s time to get planting. But first, place a few small rocks on the bottom of your container to aid drainage, making sure not to block up the holes so much that water can’t escape. Pieces of broken clay pots laid over the holes work well, too. Then, fill your container two-thirds full with a potting soil mix—garden soil is usually too heavy, while potting soil makes it easier for containers to drain while retaining enough moisture for roots to absorb. Many mixes even come with some fertilizer already in them to help get your plants established. If you have a really large pot and would like to use less potting mix, turn smaller empty containers upside down and place them on the bottom to take up some space. Then fill around them with potting mix until your container is two-thirds full.
5. Plant a Few Inches Below the Container’s Rim
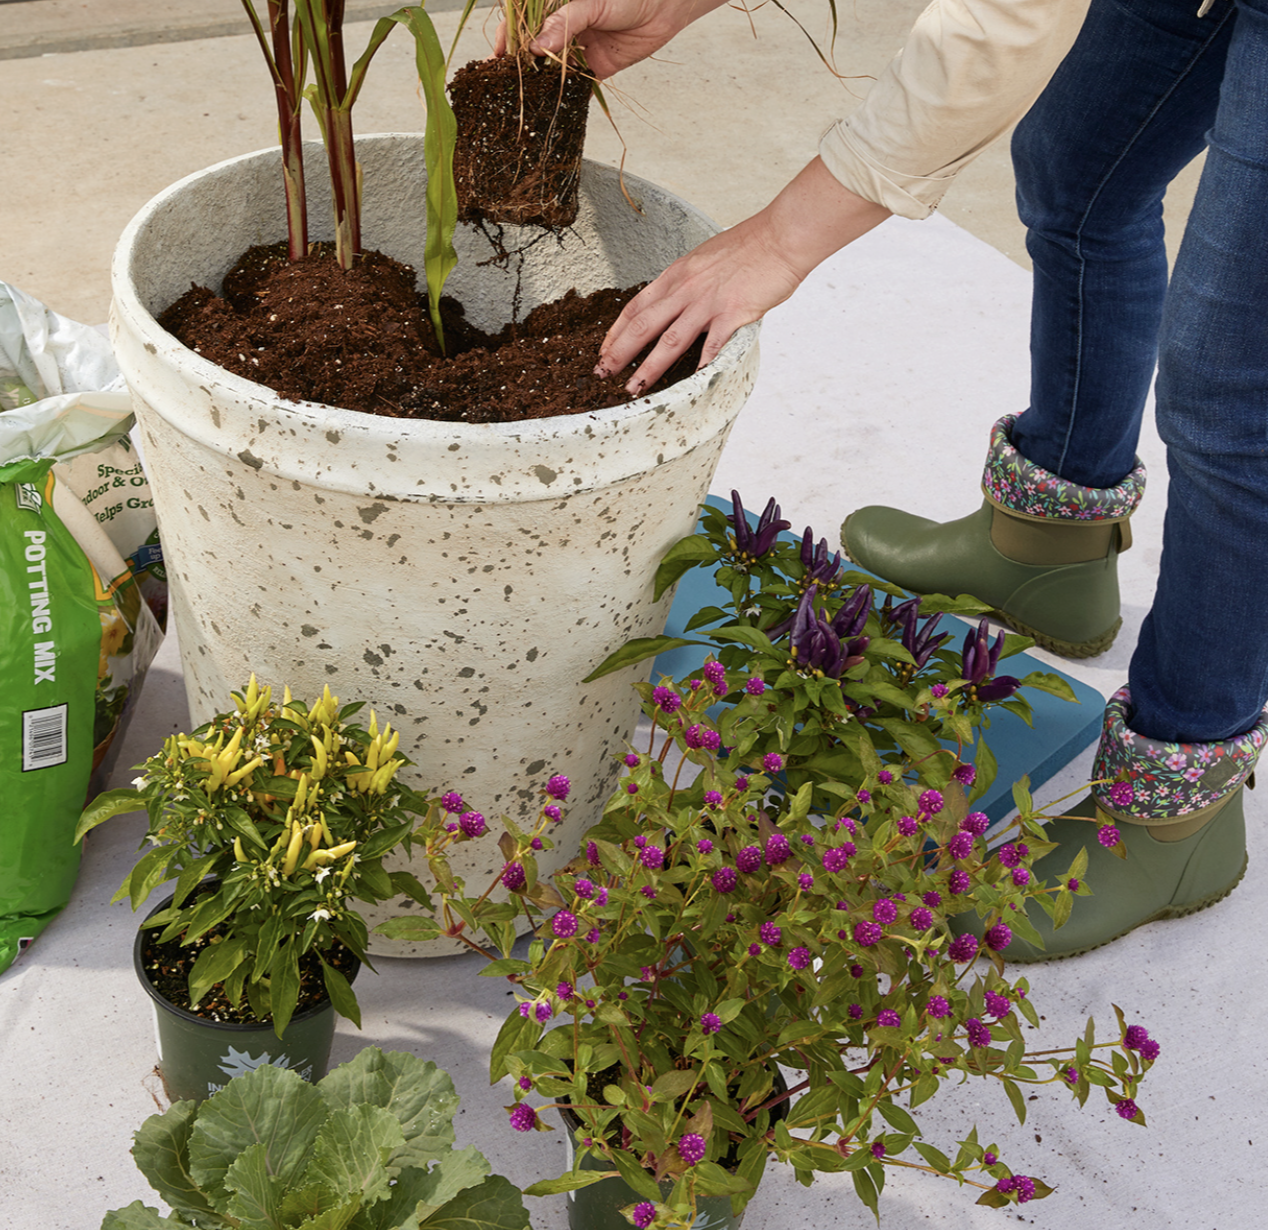
When adding plants, give their nursery containers a gentle squeeze around the sides to loosen the root ball enough to slide out—avoid tugging on the plant itself to pull it out, which may damage it. Then, set them on the potting mix so that the top of their root balls are still a couple of inches below the rim of your container—this will make it easier for you to water later. Fill in around them with more potting mix, but keep your plants’ stems no deeper in soil than when they were in their nursery containers. Press down lightly around the plants with your hands to eliminate any air pockets. Water your container garden to help the soil settle in, and add more soil if needed so that all roots are covered. Just make sure to keep the soil level a couple of inches below the rim of the container to help prevent water from spilling out whenever you pour some in.
6. Monitor Your Container’s Moisture Level
Keeping your newly created container adequately watered helps the plants settle in and start growing roots. After that first watering, check back in a day or two to see if the first inch or so of soil is dry to the touch. If it’s dry, it’s time to water again. You’ll know you’ve given your container enough water when it runs out the bottom drainage hole. If you choose to use a saucer under the pot, make sure to keep it emptied so that the plant roots do not rot when sitting in the collected water.
Plant Combination Ideas for Containers in the Shade
Focus on Foliage
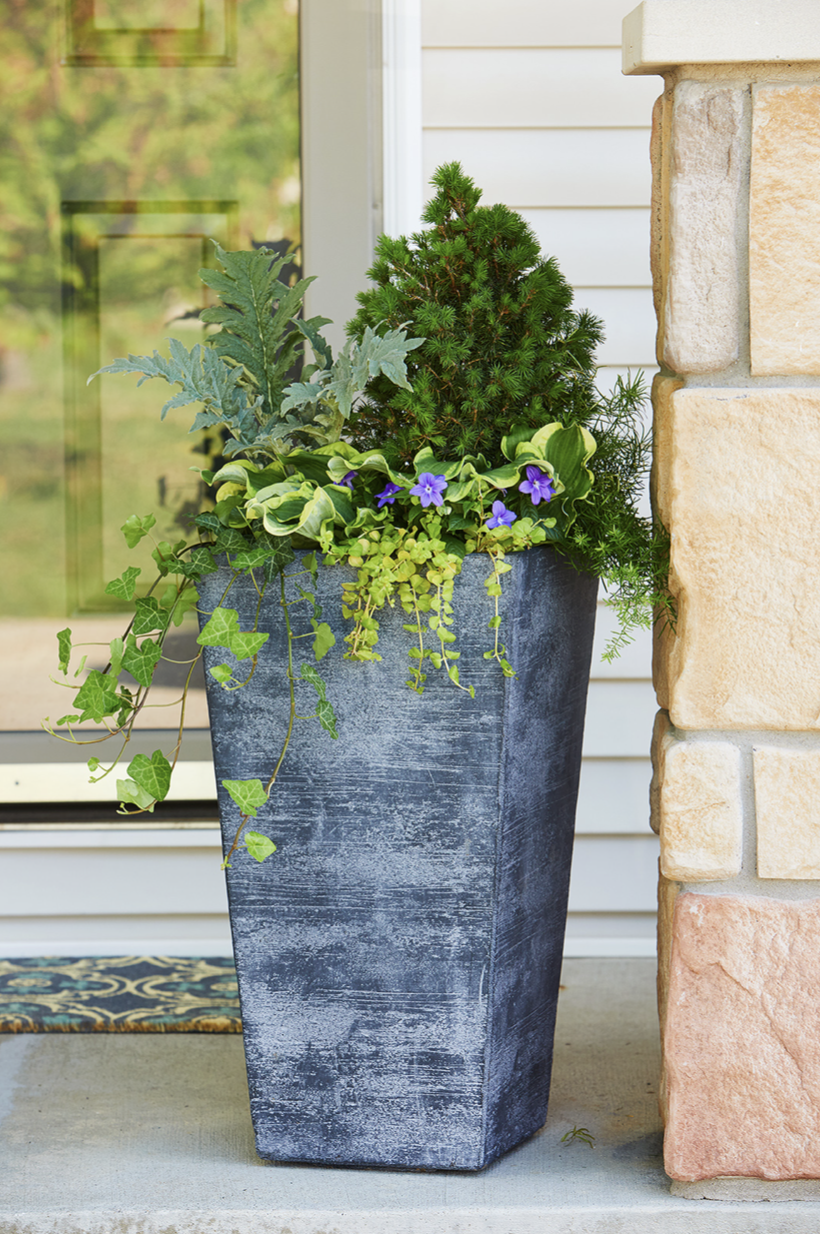
Don’t be afraid to mix up different types of plants such as annuals, perennials, vegetables, and even small shrubs. The important thing is to choose ones that all prefer the same light conditions. In this container, a dwarf Alberta spruceprovides height as a somewhat understated thriller, so we paired it with an artichoke as a more dramatic thriller with its silvery, serrated leaves. The hostas act as fillers, along with asparagus fern and browallia. Creeping Jenny and English ivy take the role of spillers. All of these different plants do well in a part shade location.
- ‘Green Globe’ artichoke
- Dwarf Alberta spruce
- ‘Goldi’ creeping Jenny
- ‘Squiggle Leaf’ hosta
- English ivy
- Browallia
- Asparagus fern
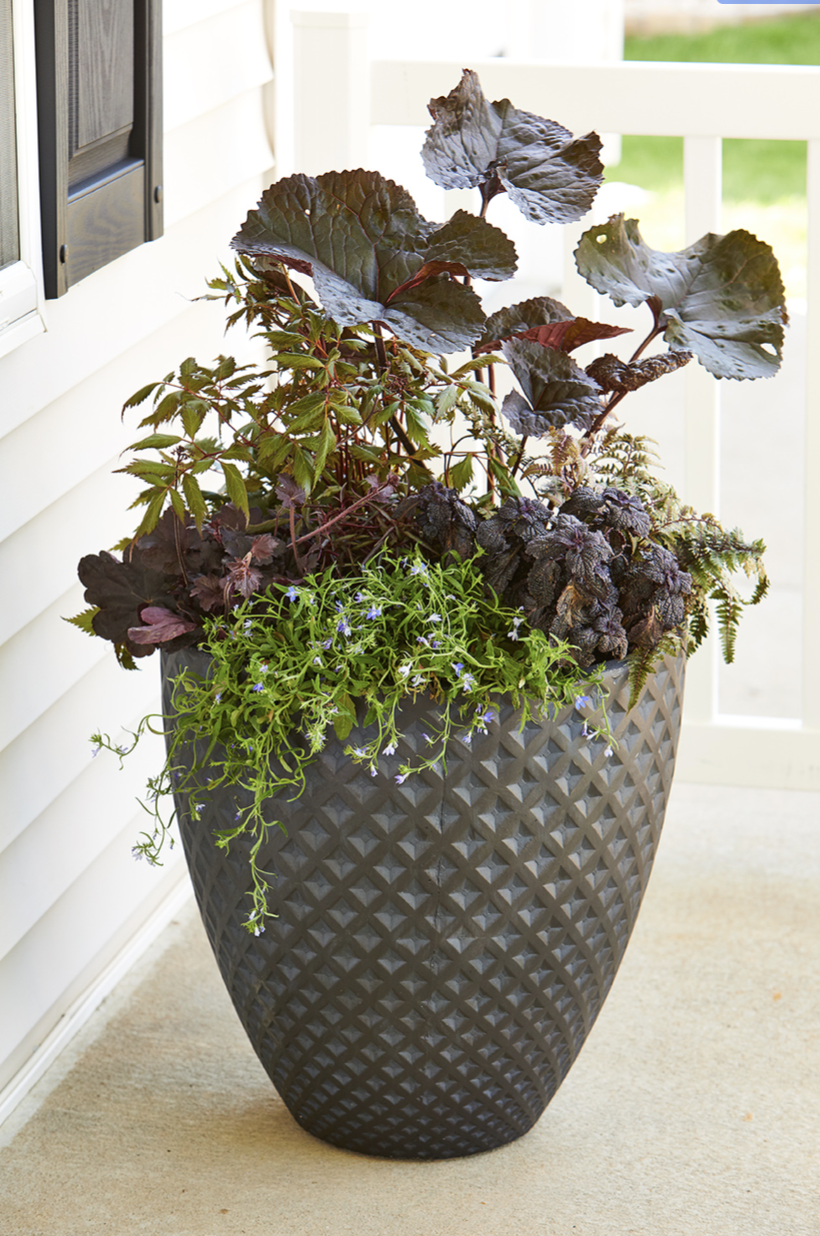
Go Dark and Bold
Deep greens and purples add depth, even in shady places. This arrangement echos the look of the container with dark, boldly textured foliage from ligularia (thriller) as well as fillers such as heuchera, coleus, and alternathera. A spiller of lobelia, along with a silvery filler of Japanese painted fern, helps to set off the darker plants in this container garden.
- ‘Fanal’ astilbe
- ‘Regal Red’ Japanese painted fern
- ‘Obsidian’ heuchera
- ‘Red Threads’ alternanthera
- Lobelia
- ‘Brit Marie Crawford’ ligularia
- Coleus
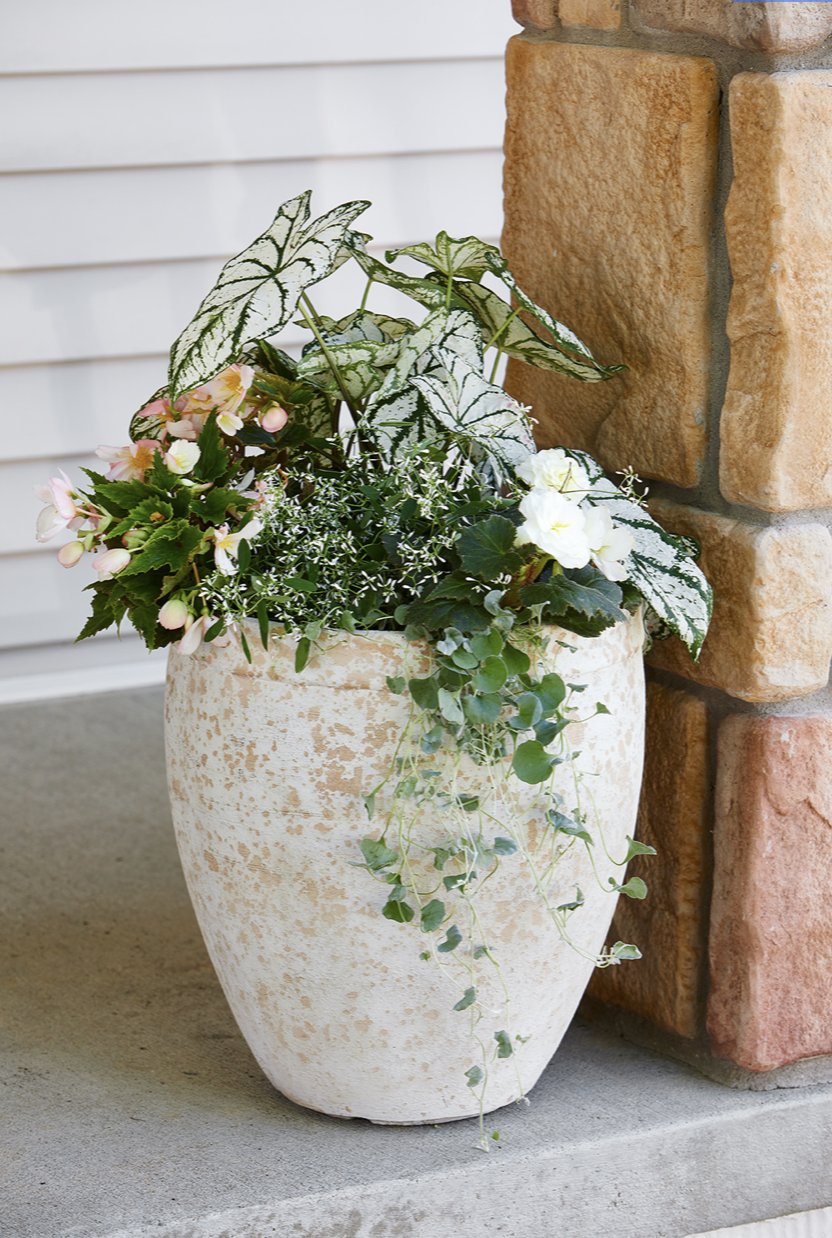
Pastel and White Container
Brighten up a shady nook with both a light-colored container and plants that feature white or pastel-colored foliage and flowers. Caladium is definitely the thriller in this container garden, thanks to its large leaves with dramatic patterns and tall stems. For fillers, euphorbia adds delicate texture as well as flowers that continue the white color theme, while begoniasbring in ivory and blush hues that mimic the finish of the container. Dichondra makes a fine spiller with its dangling stems of pale, silvery foliage.
- Caladium
- ‘Silver Falls’ dichondra
- ‘Nonstop Mix’ begonia
- ‘Waterfalls Angel Falls Soft Pink’ begonia
- ‘Diamond Frost’ euphorbia
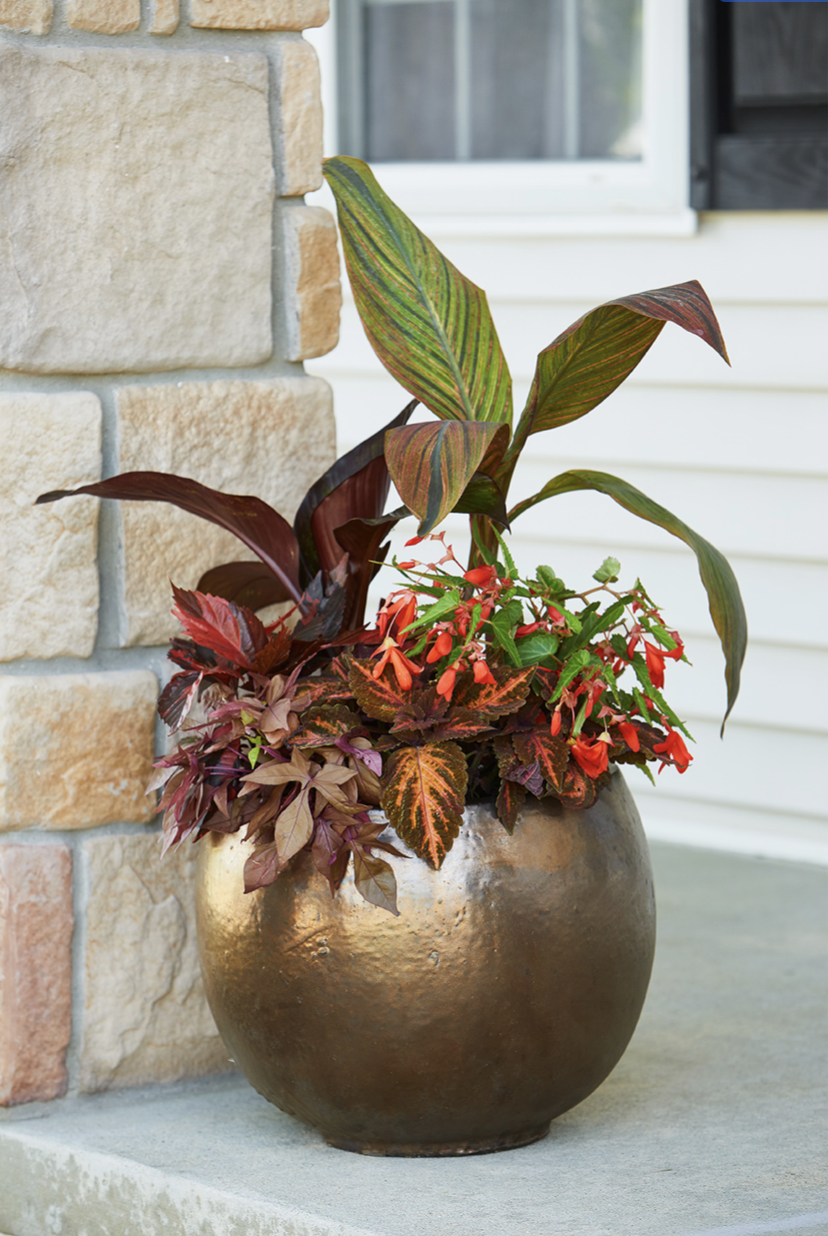
Bronze and Red Composition
The color red carries through this container in both foliage and flowers. The bronze glaze of the container brings out similar warm hues in the foliage of the sweet potato vine (spiller), copper leaf plant (filler), and canna (thriller).
- ‘Bossa Nova Orange’ begonia (sun loving)
- Coleus (sun loving)
- Tropicanna canna
- Copper leaf plant (Acalypha wilkesiana)
- Red Abyssinian banana (Ensete ventricosum ‘Maurelii’)
- ‘SolarPower Red’ sweet potato vine
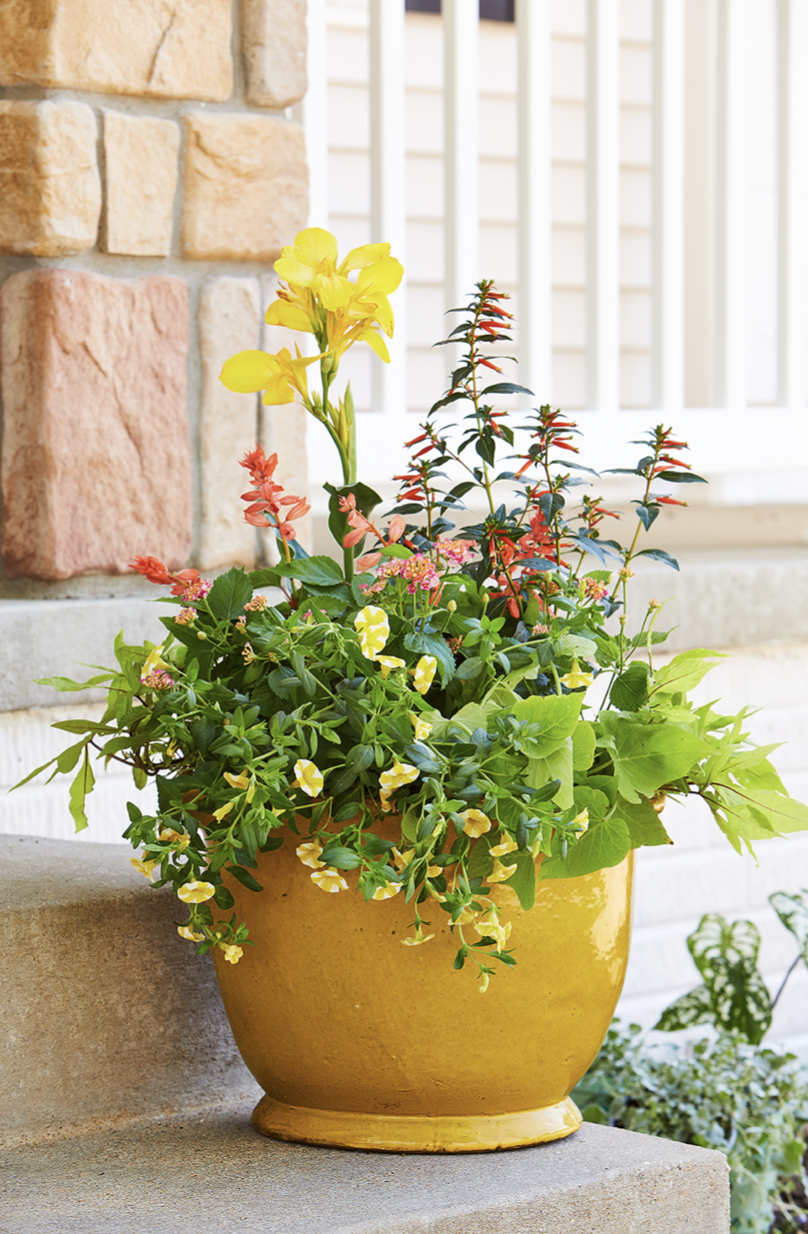
Mix Warm Colors
This combination is inspired by the warm colors of a sunset. The yellow container brings out the canna flowers (thriller) and calibrachoa (spiller). The salvia and firecracker plant (both thrillers), plus lantana (filler) heat things up even more with their fiery flowers. Two varieties of sweet potato vineadd bright foliage as spillers.
- ‘Margarita’ sweet potato vine
- ‘SolarPower Lime’ sweet potato vine
- Canna
- ‘Superbells Lemon Slice’ calibrachoa
- ‘Bandana Cherry Sunrise’ lantana
- ‘Saucy Coral’ salvia
- Firecracker plant
In Other NEWS

