


Dan Ackerman | CNET.Com
Troy Warren for CNT

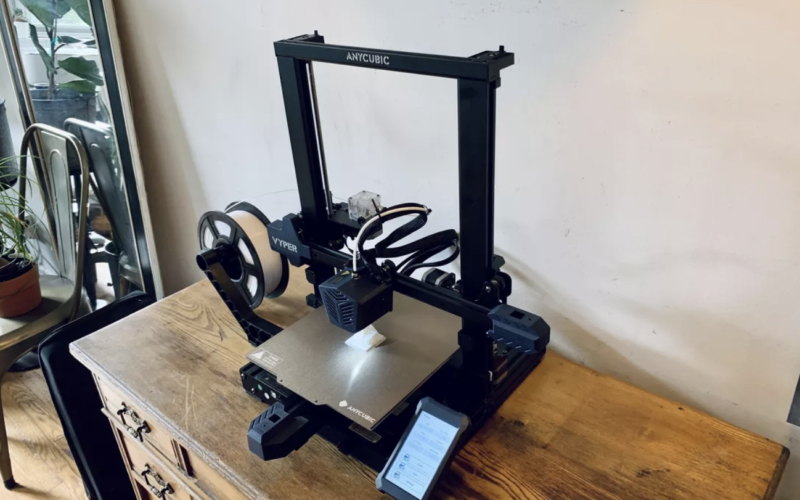
Of all the 3D printers I’ve tested, this new FDM model from Anycubic was the easiest to get set up and running right out of the box.
When it comes to 3D printers, I value ease of use, simple setup and reliability above fancy features and even print quality. After all, if a 3D printer is hard to set up, hard to calibrate or requires constant tweaking and correcting, you’re much less likely to use it, especially if you’re just starting out.
The new Anycubic Vyper attempts to be both inexpensive and easy to use/set up. It’s a tricky needle to thread. Budget printers, like the Monoprice Select Mini V2 (around $200) can be hard to set up and require a lot of trial and error to get good results. Fully assembled printers with good no-hassle results, like the Flashforge Inventor 2, can cost more than $600.
At $359, the Vyper is neither the cheapest nor the most expensive 3D printer I’ve tested, but it’s definitely the one that had me set up and creating usable prints the fastest. Almost every print I’ve tried has come out intact, which is saying something.
But the Vyper isn’t perfect. First, and this is a matter of personal preference, but I like enclosed printers over open-air ones — that makes it easier to ensure my multihour print jobs aren’t accidentally jostled or disturbed. Much more importantly, this 3D printer lacks Wi-Fi, which means you’ll need to ferry over an SD card with design files or tether to your computer via a bulky USB Type B cable. Some 3D printers I’ve tested over the past few years include Wi-Fi, others don’t, but the difference in the user experience has always been clear: Not having built-in Wi-Fi is a major disadvantage.
Aside from that, the experience was excellent, and I’m impressed with how much this 3D printer packs in for a modest price, including a heated bed and a decent touchscreen control panel. It’s also very quiet, which is a nice feature when you’re running long print jobs that can go overnight.
A quick note about types of 3D printers: This is called an FDM printer, for fused deposition modeling, which means the printer melts a plastic-like 3D filament and builds your project one layer of material at a time. Anycubic is better known for its SLA (or stereolithography) printers, which cures a liquid resin using light, slowly lifting the finished product from a vat of semi-toxic goo. Resin printing gives fantastic professional-looking results, but is not for beginners. Most consumer 3D printers are FDM models like the Vyper.
Some assembly required
While getting up and running was surprisingly painless, there is a little manual labor involved at first. The Vyper comes only partially assembled. You’ll have to attach the top part of the frame to the base with some hex screws, clip a few cable ties, attach a couple of cables and install the control panel screen. It took under 10 minutes, but it helps if you have someone who can hold the frame in place while you tighten the screws.
After that, I was ready. Plenty of 3D printers offer automatic bed leveling and calibration to make sure prints come out even and firmly anchored to the bed. This, however, is the first time I’ve seen a 3D printer run its bed leveling once, with zero manual input from me, and be totally good to go. I printed a 3D test file from the included SD card within minutes of powering on, and I’ve never seen a first print from a 3D printer come out so perfectly.
Hot bed action
While I rightly knock any 3D printer that doesn’t include built-in Wi-Fi, I realize now just how important having a heated print bed is. I’d been using a Flashforge printer for most of the past year, but its lack of a heated bed (which helps the 3D printing filament stick to the surface) was a low-level source of aggravation, requiring glue sticks and time-consuming extra base levels (called rafts) to get consistent results.
The flexible steel print bed here is attached to the heating element under it via a magnet, and I haven’t had a print come loose from the lightly textured bed yet. When you’re done printing, it’s easy to pull the thin metal print bed off, flex it a little, and your print cleanly pops free. The build volume is 245 x 245 x 260 mm, which is a decent size for a mainstream 3D printer and offers generous vertical space.
Software swaps
The Vyper comes with a version of popular 3D slicing software Cura, plus a special profile for the Vyper, although you can manually enter the specs into Cura or any other 3D printing app.
Personally, I’ve never been a huge Cura fan, as it doesn’t do a great job auto-generating supports for complex prints — those are the little tree-like extra bits that hold up overhangs while printing. I tried several other software options with the Vyper and my current favorite is a free app called Voxelizer, which does great support generation. The point here is to experiment, as almost any 3D printer can be used with any 3D printer software. Try a bunch and find one that you like.
Light up
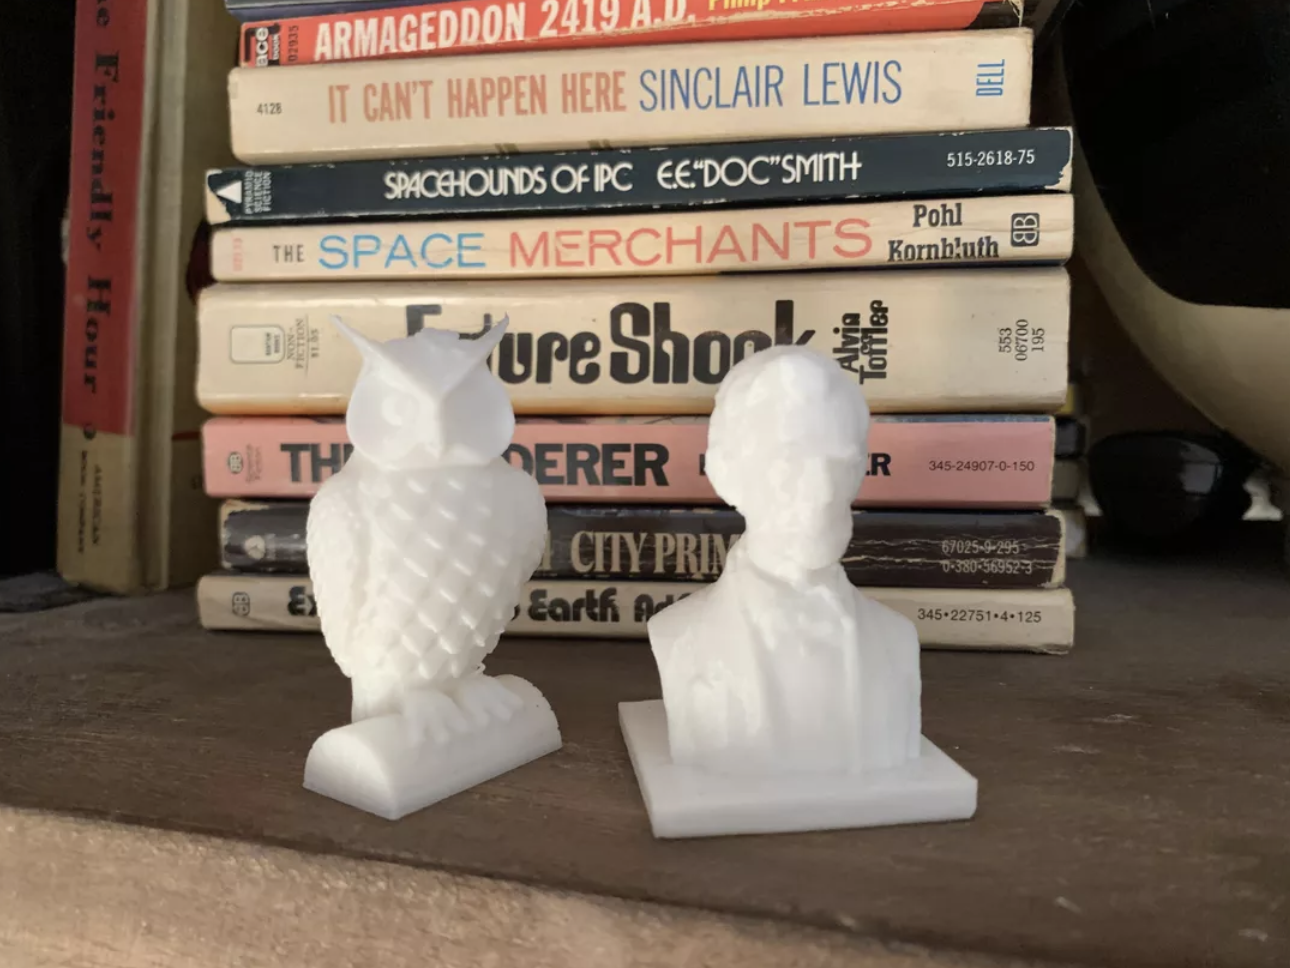
I printed a few different small projects with the Vyper, including my usual Abraham Lincoln bust test print, a new webcam cover for the 24-inch Apple iMac and some game tokens. These were not the most detailed prints ever, but the results were overall very good for a printer in this price range.
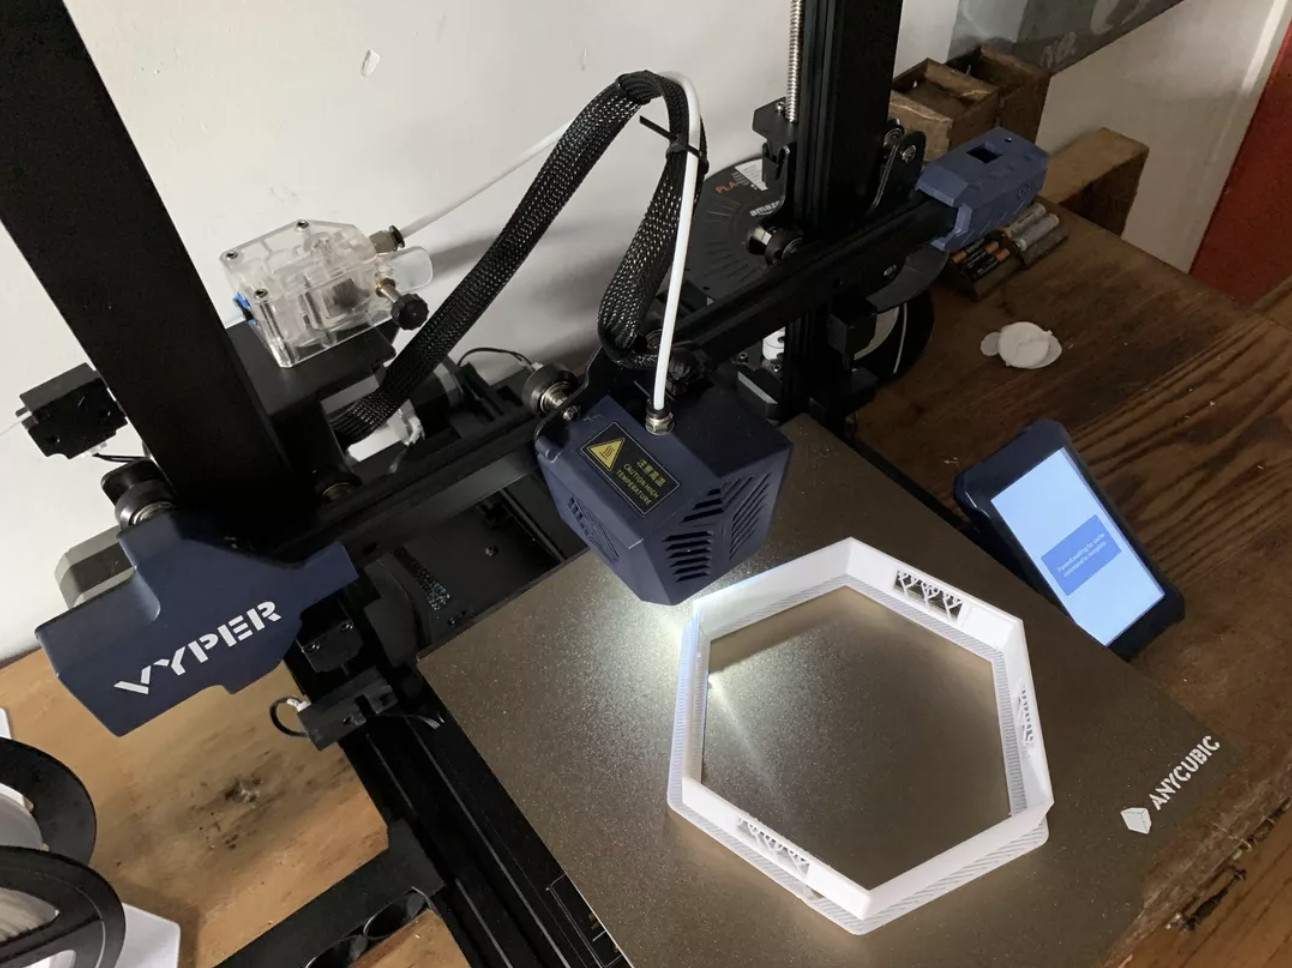
Then I decided to go for a bigger project.
My goal was to 3D print a low-budget decorative light inspired by the excellent but expensive Nanoleaf line of modular smart light panels. There are many fan-made designs available on Thingiverse, the most popular 3D printer file sharing website. I chose one that seemed structurally sound and easy to assemble. But, because I would be adding the light element via a smart GE lightstrip, I took the original design into a CAD program and redesigned it slightly to accommodate the wider lightstrip in the holes between panels. My remixed version is here, and I’ll publish a more detailed how-to on that project in the near future.
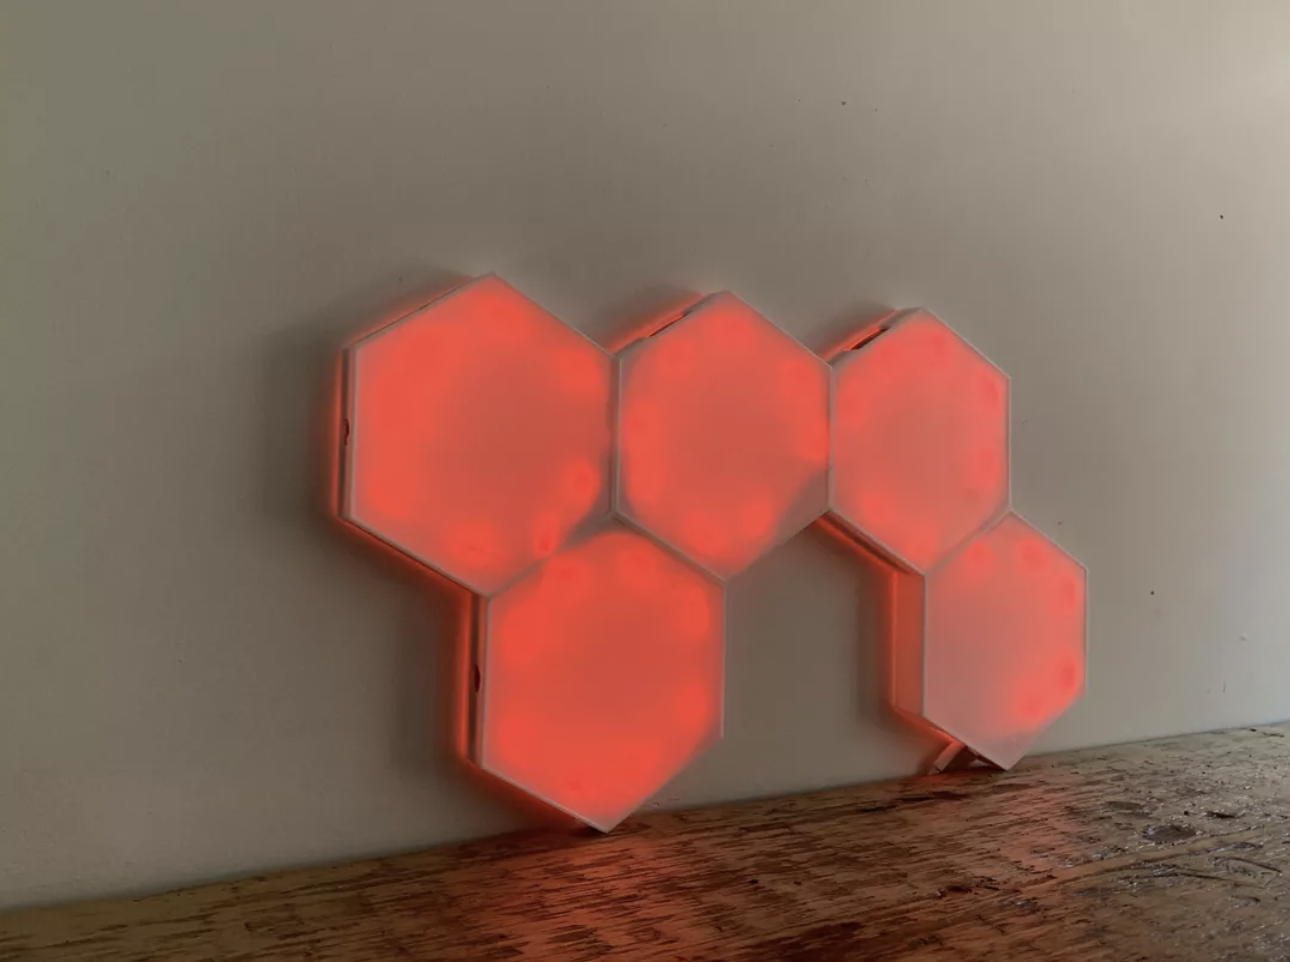
Each hex frame took three hours to print and each top panel took about 90 minutes. That’s more than 20 hours of printing time, and the Vyper greatly impressed me by completing each part correctly with no waste. My only issue was that the flat, very thin top panels on my Nanoleaf knockoff didn’t come out as smooth as I’d hoped. But that’s more of a redesign job for me, or using a different material (like very thin lucite cut on a Glowforge).
If you can put up with a little assembly, the Vyper offers a great beginner experience at a reasonable price.


In Other NEWS